This is a new topic in 12.03.
This is a new topic in 12.04.
Content highlighted in yellow is new in 12.03.
Content highlighted in blue is new in 12.04.
Approving Expenses using Task Management
Task Management is part of the Project and Operations Productivity Apps. It is a mobile and web application that automates and adds process consistency and operational rigor to Expense Approval.
Expenses are submitted using the Expenses POP App and these can be approved by a Managing Approver either by ERP+ or by using the Mobile App with Task Management.
Adding Task Management to a User
Setting Up a User to have access to Task Management
When an Employee is activated in the Expenses POP App, they're allocated User Groups.
At this stage you will determine if they are a Claimant, or a Claimant and Managing Approver or a Claimant and Finance Approver.
To add Task Management to a User, they'll need to be a Managing Approver, as Task Management is for Managing Approvers only.
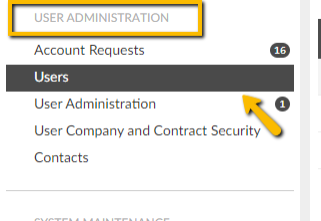
Under the Administration Tab in the Expenses POP App, go to User Administration and select Users.
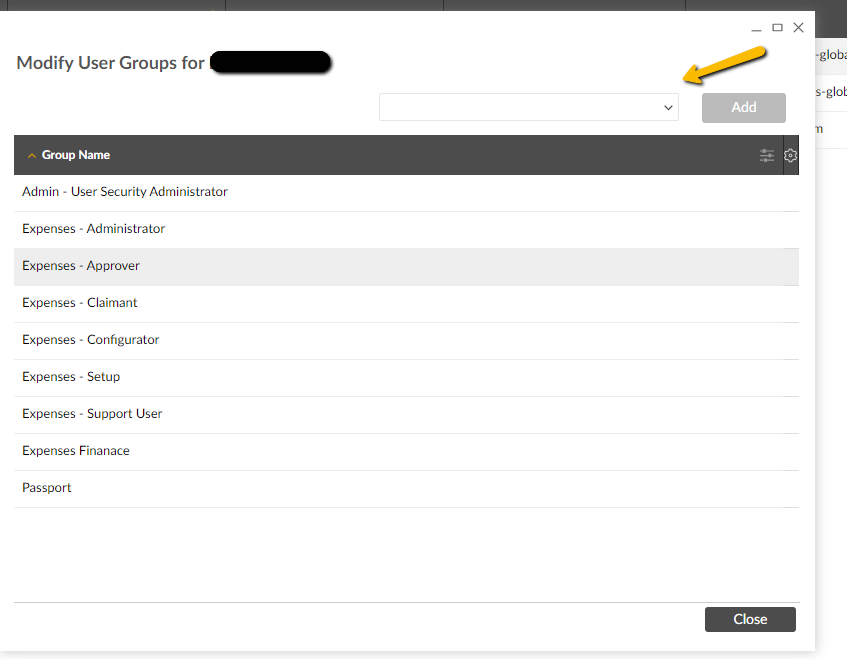
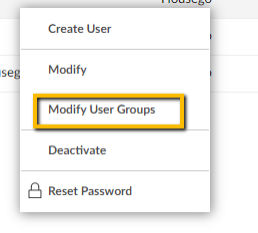
Select the User to amend and right click on their name, then select Modify User Groups
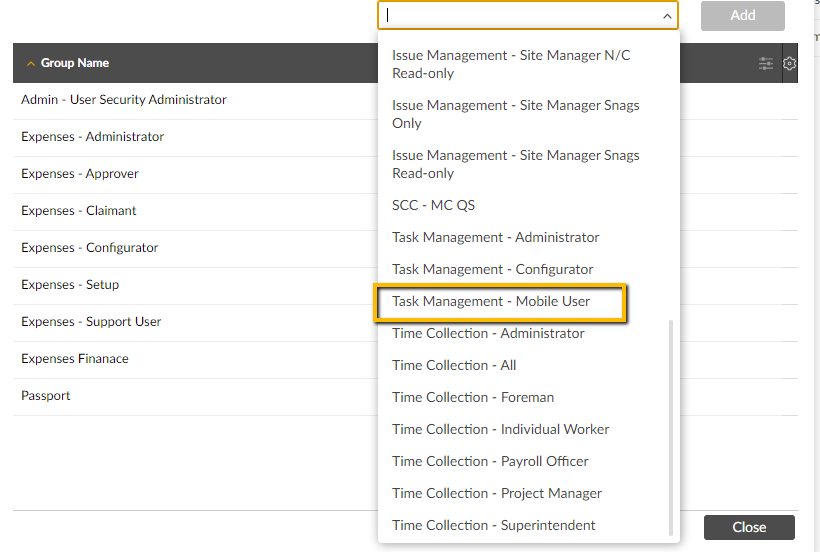
When you select the drop-down box you see a list of Groups which are eligible to be assigned to the User. Select Task Management – Mobile User.
When a User has the Expenses Approver and Task Management Mobile User added they can access the User Preferences – Mobile Approver and select “Receive Expense Reports to Approve via Task Management and tick this box.
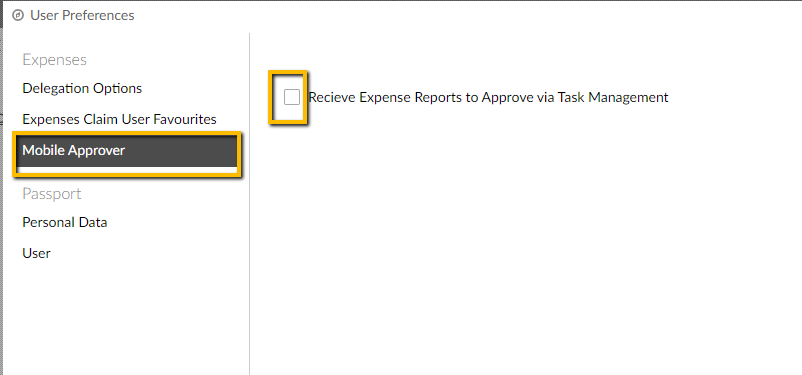
This is locked until Task Management has been assigned to the User.
Task Management on Mobile App
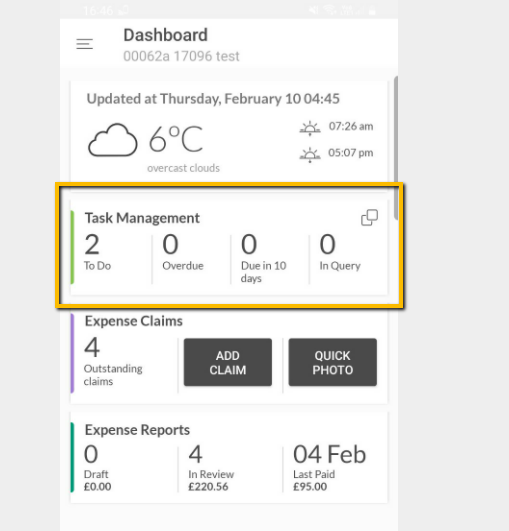
When your Managing Approvers log into the Mobile App they'll see that the Dashboard has changed, and Task Management is now available.
On the Dashboard it will show them how many Tasks are outstanding for review, how many Tasks are Overdue, how many are due in 10 days and how many Tasks they have put in Query.
Task Management Expense Reports
Reviewing Expense Reports
When the Managing Approver taps the “To Do” cell they're taken to the following screen
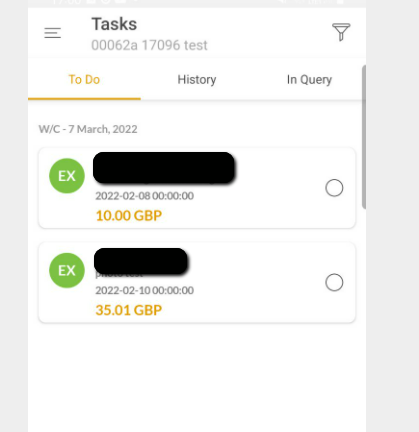
It shows a list of all Expenses awaiting Review and Approval or Rejection.
The Managing Approver must tap on the Expense Report to Review. An Expense Report is displayed.
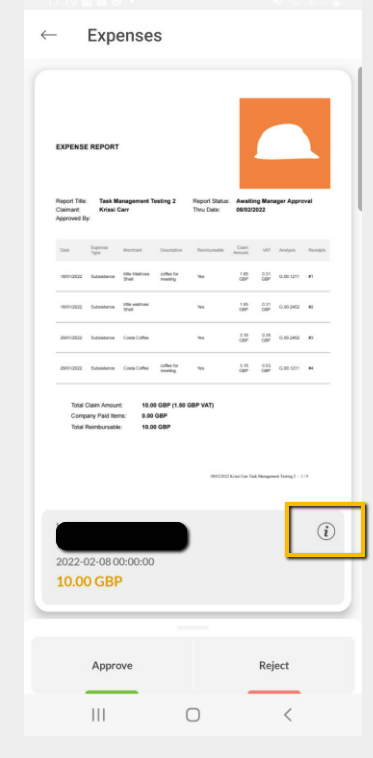
The Managing Approver can Review the Expense Report in greater detail.
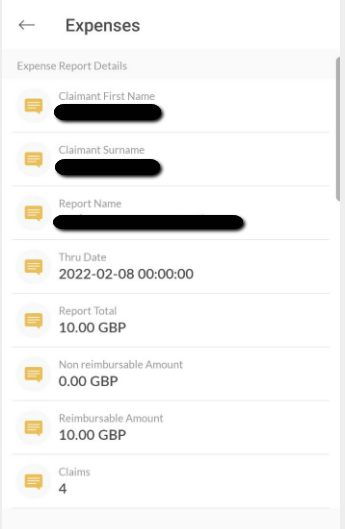
Selecting the “i” button, they'll see a Snapshot of the Report, detailing the Name of the Claimant, Report Name, Submission Date, Total Report Amount, Non-Reimbursable Amount included (Credit Card) and Reimbursable Amount (Personal Expense)
Once they've gone back to the Report at top level, they swipe left on the screen and the Report opens in more detail showing any receipts that have been attached the Claim.
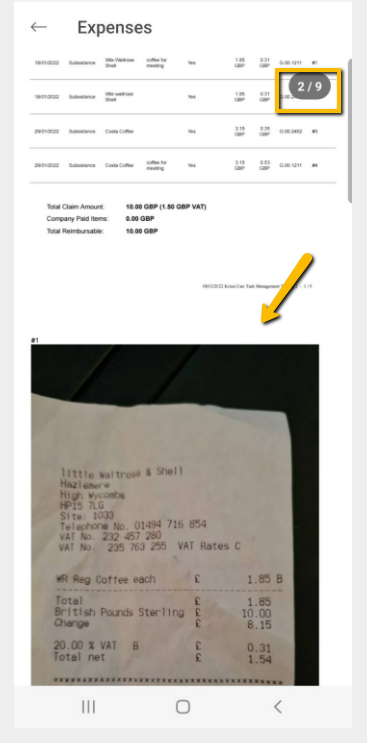
The Report shows how many pages there are for the Claim, and swiping up and down, allows the Approver to see all attachments.
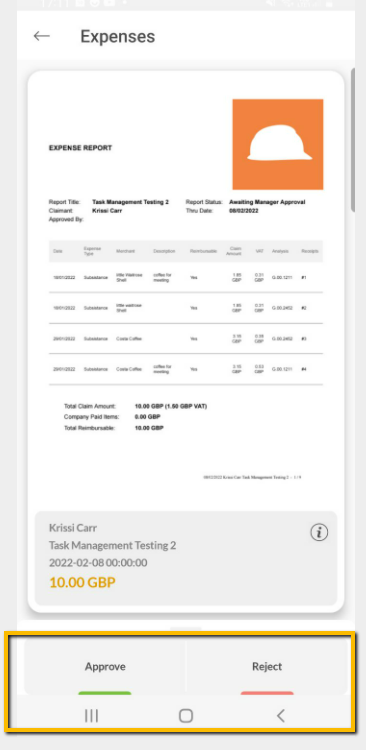
Approving Or Rejecting Claims
Once they've reviewed the Claim, they come out of the Report using the back button and select the Approve or Reject option at the bottom of the screen.
When Approve is selected, an Approving Box appears.
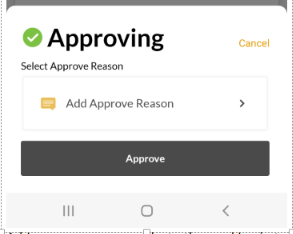
Select Add Approve Reason – Type the Reason in the Other Box and select Confirm at the bottom of the page.
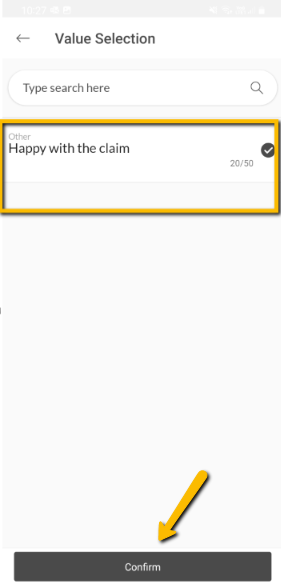
This takes you back to the original approving screen, where you need to Approve once again and then the Report is submitted as Approved.
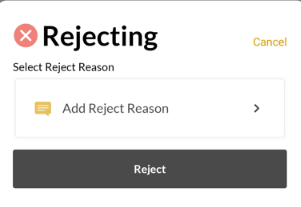
If Reject has been selected, you follow a similar process.

This takes you back to the original approving screen, where you need to confirm once again and then the Report is Rejected.
With Task Management you are only able to Approve the Claim as a whole or Reject the whole claim. Claim Lines cannot be treated separately. You're also unable to modify costing using Task Management.
Once the Approval or Rejection process has been completed, the Task will move from “To Do” to History Tab.
From here you have the ability to see past Expense Reports they have Approved or Rejected for Claimants.
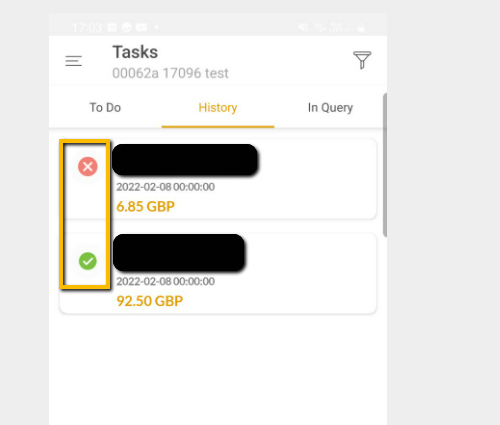
At a quick glance they can see which Reports were Approved or Rejected by the Green Tick for Approve and the Red Cross for Rejected.
Filtering
When you are in the Tasks menu there is a possibility to filter your view.
Clicking on the Filter button takes you to the choices.
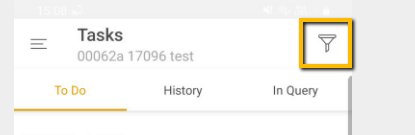
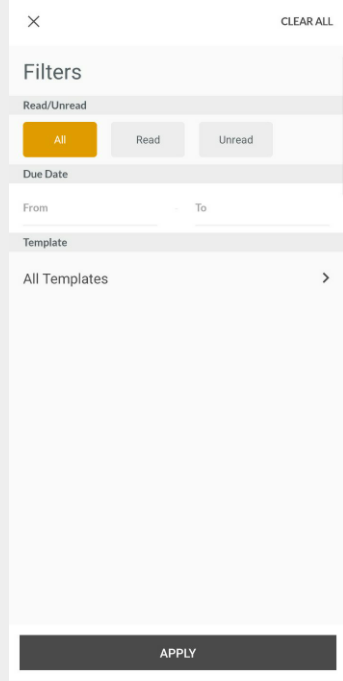
If a filter is applied it relates to all 3 Headings – To Do, History and Query.
Select your choices and press Apply.
To change the filter, select Clear All in the top corner and press Apply.