This is a new topic in 12.03.
This is a new topic in 12.04.
Content highlighted in yellow is new in 12.03.
Content highlighted in blue is new in 12.04.
Viewing Time Collection for an Employee
-
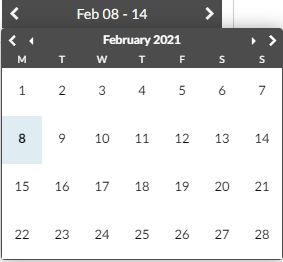
Select the week for which you wish to view time collection using the date picker at the top of the screen. Use the < and > buttons either side of the date to switch between weeks, or click on the date to open the calendar, then click a day on the week you wish to view. Note that all web data is archived after 90 days and will no longer be available to view.

-
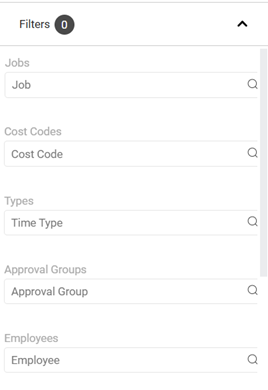
If you wish to filter by job, cost code, time type, approval group, employee, foreman/project manager, employee type, or status, click the down arrow at the top of the employee list to open the Filters panel. Note that these filters apply only to the employee list, not the timesheet. For example, if you set a job filter for job '123', the employee list will then contain only employees who logged time for job '123' during the selected week. However, when you click on one of those employees, you will be able to see every time transaction for that employee during the specified week, including but not limited to those related to job '123'.

- To add filter criteria, click the search bar to open a drop-down menu, then tick the boxes to select the criteria you wish to filter for. If the list is large, you can enter a search term in the search bar to help find the desired value. When you click away, your selected filter criteria will appear beneath the search bar and the filter will be applied to the timesheet.
- To remove a filter, click X next to the filter you wish to remove. To remove all filters, click the Clear All button at the top of the panel.
- Click the up arrow at the top of the Filters panel to return to the employee list.

-
All employees with time logged within the selected week with at least one transaction matching whatever filters you have set will now be listed on the left side of the screen. Click an employee from this list to view the timesheet for that employee on the right side of the screen.