This is a new topic in 12.03.
This is a new topic in 12.04.
Content highlighted in yellow is new in 12.03.
Content highlighted in blue is new in 12.04.
Timesheet Groups
Timesheet groups are used to set rules and tailor the experience for Time Collection Individual mobile app users. Every TC Individual user must be assigned to a timesheet group to be able to make time transactions on the app. These groups are configurable on the Timesheet Groups screen.
To open this screen, click Setup in the Administration section of the side menu, then click Timesheet Groups.

Creating a timesheet group
-
Click
 . This opens the Create New Timesheet Group screen.
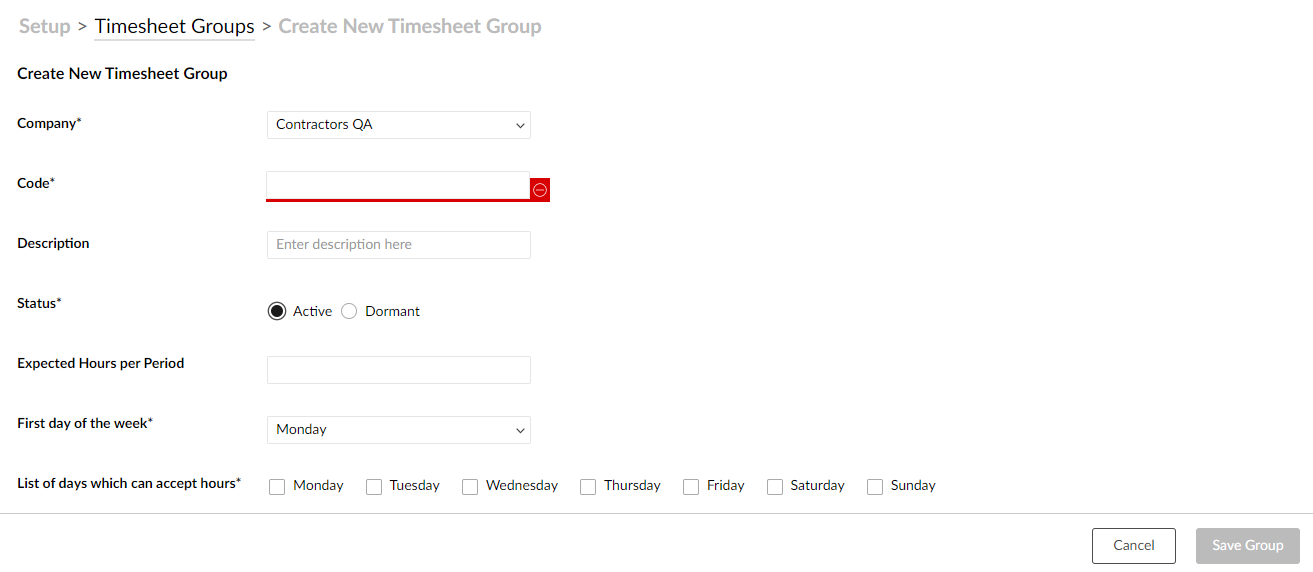
-
Complete the fields as follows:
|
Company |
Select the company which this timesheet group is for. Only users of this company will be able to be added to this group. |
|
Code |
Enter a code for the timesheet group. |
|
Status |
Select whether to make the group active or dormant. Users assigned to a dormant timesheet group will not be able to record any time transactions. |
|
Expected Hours per Period |
Enter the number of worked hours the employees of this group will be expected to record per timesheet period. |
|
First day of the week |
Select which day will be the first day of the work week for employees of this group. |
|
List of days which can accept hours |
Tick the days on which employees of this group will be expected to record time transactions (the working days of the week). Even if days are unticked, employees can still record time on those days if necessary. |
|
Expected Hours for Day |
Enter the number of worked hours the employees of this group will be expected to record for each day. You can only enter expected hours for the days which you ticked to accept hours in the above section. |
|
Lunch Schedule |
Select which lunch schedule will be used by employees of this group. These schedules are configured in Setup > Lunches and Breaks. |
|
Break Schedule |
Select which break schedule will be used by employees of this group. These schedules are configured in Setup > Lunches and Breaks. |
|
Time Entry Interval |
This field can be ignored as it relates to functionality not yet available. |
| Can Add Non-Real-Time Transactions | Select which applications (if any) will allow users to record time transactions from the past. |
| Allow Future Dated Transactions (Individual App) | Tick this box to enable future-dated transactions for Individual app users. If enabled, users will be permitted to pre-emptively add time transactions for future days, up to the final day of the current timesheet period. |
| Can Edit Hours Breakdown (R, O, D) | Tick this box to enable the hours breakdown functionality for Individual app users. If enabled, the "Allocate daily hours to" field will be available on the Add Shift and Add Transaction screens, allowing users to allocate their recorded hours to the Regular (R), Overtime (O) and Double Time (D) categories. |
| Require Employee Photo at Clock In and Clock Out on Individual App | Tick this box to make it a requirement for Individual app users to take a photo of themselves each time they clock in and clock out, to help prevent employees from clocking in and out for each other. |
|
List of Timesheet Types/Subtypes |
Tick the boxes to select which timesheet types will be available to employees of this group when they are making time transactions. Once you tick to enable a timesheet type, the linked timesheet subtypes become available to toggle. The Worked Hours timesheet type is always enabled. |
|
Super Approvers |
Select at least one user to assign as a super approver for this timesheet group. Super approvers do not yet have any functionality, but you must still assign one to be able to save the group. The list of available super approvers is configured in Setup > System Configuration Individual. |
|
User Prompts |
Select which prompts will be shown to employees of this group when they clock in or clock out. These prompts are configured in Setup > User Prompts. |
-
Click
 to save the timesheet group.
Editing a timesheet group
-
Click the code of the timesheet group you wish to edit in the Timesheet Groups grid to open it.
-
Edit the fields on the Group Configuration tab as necessary. Note that if the timesheet group is already in use, some fields will be locked.
-
Open the Timesheet Periods tab to set the timesheet periods for this timesheet group.
-
To add a new period, click
 to open the Add New Period window.
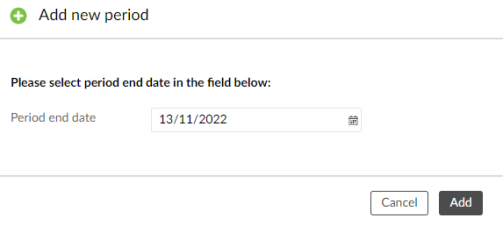
Enter the period end date in the field or select it from the calendar lookup, then click
 .
. -
The period status and reporting status of each timesheet period can be changed from the grid using in-line editing. You can also update the statuses of multiple periods at once by selecting them using the checkboxes in the left most column, then clicking the Freeze/Unfreeze periods and Close/Open periods buttons. While it is possible to close a period without freezing it, once a period is frozen it is automatically closed to reporting. Once a period is closed to reporting, employees will no longer be able to record any time within that period.
-
To delete a timesheet period, click the trash can icon
 in the Actions column, then click
  on the popup. You can also delete periods at once by selecting them using the checkboxes in the left most column, then clicking Delete periods.
-
-
Open the Tolerances tab to set the tolerances for this timesheet group. See System Configuration for an explanation of tolerance and rounding.
-
Click
 to save your changes.
Deleting a timesheet group
To delete a timesheet group, click the trash can iconin the Actions column. You will receive a warning popup asking if you are sure.
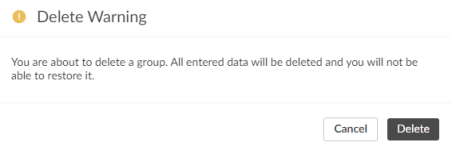
Click  to confirm.
Assigning employees to a timesheet group
Employees can be assigned to timesheet groups on the Administration > Employee List screen. See Employee List for more details.