This is a new topic in 12.03.
This is a new topic in 12.04.
Content highlighted in yellow is new in 12.03.
Content highlighted in blue is new in 12.04.
Initial Setup
-
Right-click an approval group, or left-click a group and click the menu icon
 , then click Add New. This opens the Approval Group Edit window.
-
Select the company you wish to create a workflow for from the drop-down list.
-
Enter a name for the approval group.
-
Set the Effective Date for the workflow. This is the date on which the workflow will go into effect. By default, this is one day in the future, but you can move it forward or back if necessary.
Adding and Removing Approver Levels
For the workflow to be valid, there needs to be at least one level of approver and one level of finance approver. To prevent expense reports from getting stuck, the highest level of each type of approver always has an unlimited approval limit.
To add an approver/finance approver level:
-
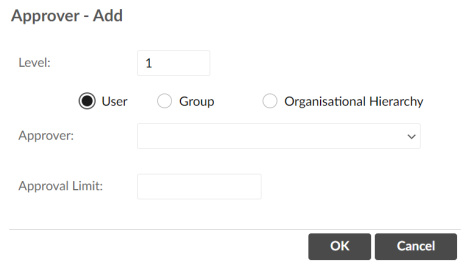
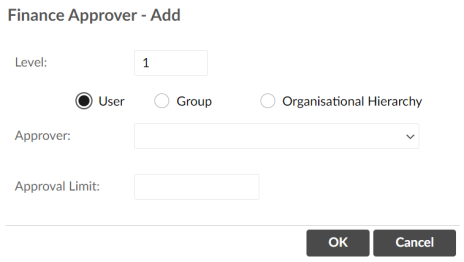
Right-click the empty space in the Approvers grid or the Finance Approvers grid and click Add New. This opens the Approver -Add window or the Finance Approver - Add window, respectively.
-
Enter the level number of the level you wish to add. Level number “1” is the first approver level that expense reports will be sent to, level number “2” is the second approver level and so on.
-
Select which list you would like to select the approver from. If you select User, the Approver drop-down will contain a list of Expenses users with the Approver user role. If you select Group, it will contain a list of Expenses user groups. If you select Organisational Hierarchy, it will contain the HR fields from ERP+ (Manager, Supervisor, Director, Reports To).
-
Select the approver you wish to assign to this level from the Approver drop-down menu. If cross-company costing is enabled in Expense Parameters, you can select from all approvers within your organisation. If cross-company costing is disabled, you can only select from approvers within the company you selected in the initial setup.
-
Enter the Approval Limit of the level. For the workflow to be functional, level two should have a higher approval limit than level one, level three higher than level two and so on.
-
Click
 to add the level. It will now appear in the relevant grid.
To modify a level:
-
Right-click the level you wish to modify, or left-click the level and click the menu icon
, then click Modify. This opens the Approver – Edit window or the Finance Approver – Edit window. -
Edit the details as necessary.
-
Click
to save your changes.
To delete a level:
Right-click the level you wish to delete, or left-click the level and click the menu icon , then click Delete. Alternatively, click the red cross  in the Remove column on the level you wish to delete.
The level will then be removed from the grid. If there are higher levels in the workflow than the one you deleted, they will all move down one level number to fill in the gap.