This is a new topic in 12.03.
This is a new topic in 12.04.
Content highlighted in yellow is new in 12.03.
Content highlighted in blue is new in 12.04.
User defined fields are customisable fields that you can set up within an expense type policy. They will appear under the Further Required Information section in the Manage Expense Claim Item window when claimants are creating expense claim items of the expense type designated in the policy.
They are useful when you wish for claimants to enter specific information for expenses of a certain type, which would not otherwise be covered by the default fields. For example, for a “Train Fare” expense type, you may wish to know which station the claimant left from and which they arrived at.
Up to seven user defined fields can be added per expense policy. Once an expense policy has been used by a claim item, user defined fields can no longer be added, modified or deleted for that policy, however the sequence numbers can still be changed.
Creating a User Defined Field
-
On the Manage Expense Policy window, tick the box next to Are user defined fields required for this Expense Type?
-
Click the User Defined Fields tab that has appeared. This shows a list of all user defined fields in this policy.
-
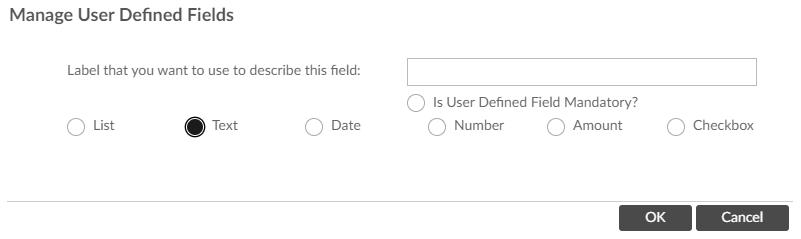
Right-click the grey area underneath the field headings then click Add New. This opens the Manage User Defined Fields window.
-
Fill in the fields as follows:
|
Label that you want to use to describe this field |
The text that will appear next to the field. |
|
List/Text/Date/Number/Amount/Checkbox |
The type of data the field will store. If you select List, you must then select which list you want to use from the drop-down menu that appears. This set of lists is configured in Custom Lists in the Administration Module. |
|
Is User Defined Field Mandatory? |
Tick this box if you want to block claimants from adding the claim item to an expense report until they fill in the user defined field. |
-
Click
 to save the user defined field.
Modifying a User Defined Field
- Right-click the user defined field you wish to modify, or left-click the field and click the menu icon
 , then click Modify. This opens the Manage User Defined Fields window for that field.
 - Edit the fields as necessary.
- Click
 to save your changes.
Sequence Numbers
Each user defined field added to an expense type is given a sequence number. These numbers indicate the order in which the fields will appear in the Manage Expense Claim Item window. The field with sequence number 1 will appear first in the list, number 2 will be second in the list and so on. You can modify the sequence number of a user defined field by clicking the up and down arrows in the grid.

Deleting a User Defined Field
-
Click the User Defined Fields tab in the Manage Expense Policy window.
-
Right-click the user defined field you wish to delete, or left-click the field and click the menu icon
 , then click Delete. You will receive a warning message asking if you are sure.
-
Click
 to confirm the deletion. If necessary, the sequence numbers of the remaining fields will be shifted to fill in the gap.