This is a new topic in 12.03.
This is a new topic in 12.04.
Content highlighted in yellow is new in 12.03.
Content highlighted in blue is new in 12.04.
Once you have selected a contract, you will be taken to the Dashboard.
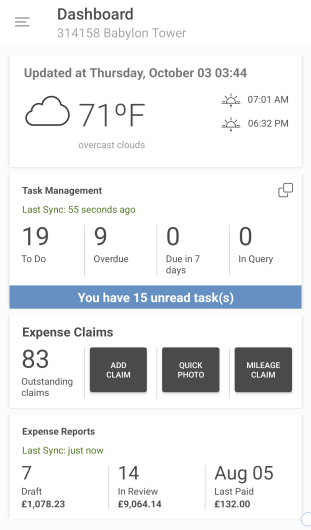
The Expenses dashboard widget contains three to four buttons you can press.
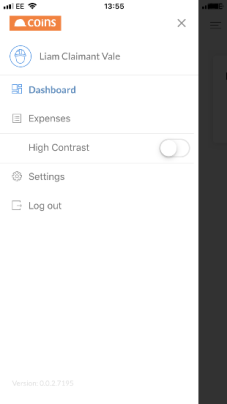
Outstanding Claims takes you to the My Expenses screen with the Claim Items tab open, where you can view, add, edit and delete claim items. You can also get to the My Expenses screen by selecting Expenses from the umbrella menu (tap  to open).
Add Claim opens the camera on your phone, so you can take a photo of the receipt, before taking you to the Add Claim screen to enter details about the claim.
Quick Photo opens the camera on your phone, so you can take a photo of the receipt, after which a claim item is immediately created containing only that photo. If you have specified a default report, or if you only have one draft report and no rejected reports, the claim will be automatically added to that report. This function is useful for when you do not have time to add a full claim item; you can go back and add details to it later.
Mileage Claim opens the Select Route screen, where you can begin to make a mileage claim using integrated Google Maps functionality (see Google Maps Mileage Claims below for further details). This button may be hidden depending on the expense parameter settings.
Claim Items Tab
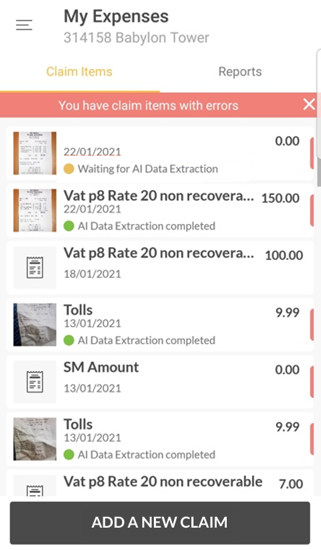
On opening the Expenses app, you will be taken to the My Expenses screen with the Claim Items tab open. This is where you manage your expense claim items.
An expense claim item is a record of an individual amount that you wish to claim for, relating to individual expense. You can enter expense claim items immediately as you incur each expense or enter them all together before creating your expense report. If you choose to do the latter, it is important that you know your company’s policies, as you may be restricted by how far in the past you can claim expenses.
If you have already created some draft expense claim items, they will be visible here.
Entering an Expense Claim Item
-
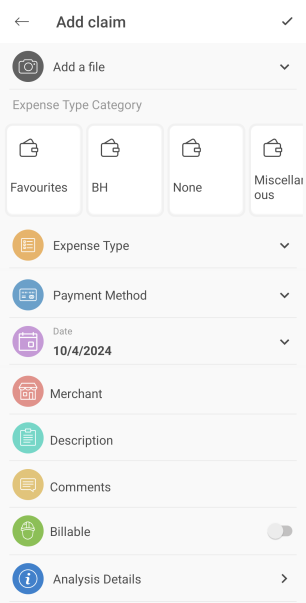
Tap the ADD A NEW CLAIM button at the bottom of the screen. This opens the Add Claim screen.
-
If you have a picture of the receipt for the expense, tap “Add a file”, then select it from your camera roll. If you have the receipt but haven’t taken a picture of it yet, tap “Add a file”, then tap the Camera icon on the left to open your camera and take a picture of it, then tap “Use Photo”. You can add multiple images if necessary. See here for supported file types.
-
Save the expense item with the receipt uploaded.
-
Wait 10-15 seconds. This is to allow time for the expense item to be received by the web app and the scan to take place.
-
Pull to refresh the Expense Claim Items screen. If the scan has taken place, the OCR status beneath the item will say 'AI Data Extraction completed' with a green circle. If it still says 'Waiting for AI Data Extraction' with an orange circle, wait a few seconds longer then refresh again. If there is no OCR status indicator, that means OCR has not been enabled by your Expenses Configurator.
-
Complete the remaining fields as follows:
Expense Type Category Select the relevant category for this expense if it is available. This selection will limit the expense types available to select from the next field. This field is not mandatory; if the expense type you wish to select does not belong to any category, it is necessary to make no selection here. Expense Type Select an Expense Type from the menu. Vehicle This field appears if you selected the Mileage/Vehicle-based expense type. Select the vehicle you are recording mileage for from the menu. If the relevant vehicle is not in the list, you must use the web module to update your list of vehicles. See My Vehicles for further information. Amount The Amount field(s) will appear after you select the expense type. Enter the amount of the expense and the number of units and/or rate if necessary. If multi-currency is enabled on your account, you can also edit the currency if necessary. If you select a different currency, the expense amount in the base currency and the exchange rate will be displayed beneath - both are editable. VAT (UK only) The VAT is automatically calculated after you enter the amount, but you can still edit it if necessary. Payment Method Select the payment method you used from the menu. If there is only one payment method available, this will be selected for you. Date The date on which you incurred the expense. Merchant The business with which the expense was incurred. Description A description of the expense. Comments Any additional information that may be relevant. Billable Turn this switch on if the expense is billable to a client. -
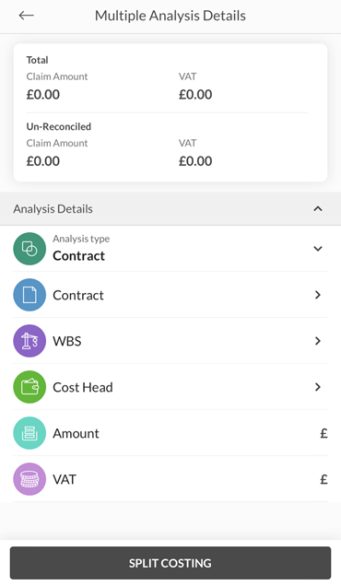
Depending on your company's Expense Parameters, you may be able to edit the Analysis Details. If the field is available and you wish to change to something other than the default details, tap the Analysis Details field to open the Analysis Details screen and fill in the details. Tap the reset button
 in the top-right to revert to the default details. The Analysis Details field will be highlighted if the details you entered are invalid and an error will be shown at the bottom of the screen (see below for Expense Claim Item Errors).
If the multiple costing parameter is enabled, the Split Costing button will be available at the bottom of the screen. If you wish to split the claim amount across multiple analysis details, tap Split Costing. The Claim Amount and VAT fields will become editable and a new Analysis Details section will appear below. You can split the claim up to three times this way.
-
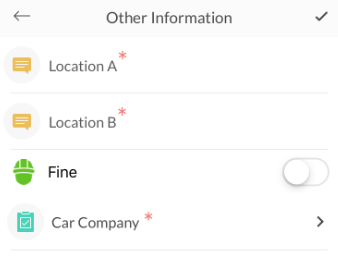
Certain expense types may require further information in addition to what you entered in the default fields. If you have selected such an expense type, the Other Information field will appear at the bottom of the screen.
If OCR has been enabled by your company, the Expenses system will automatically scan your uploaded receipt image and auto-fill the Date, Amount and Merchant fields based on the scanned image. It will also attempt to auto-fill the Expense Type based on previously scanned receipts from the same Merchant. The OCR scan takes place in the web app, so if you wish to use this feature on mobile:

Tap the Other Information field to open the additional fields, then complete them as necessary. Mandatory fields are marked with a red asterisk. Tap the tick in the top-right when you are done to save your changes.
-
Tap the tick in the top-right of the screen to save the claim item.
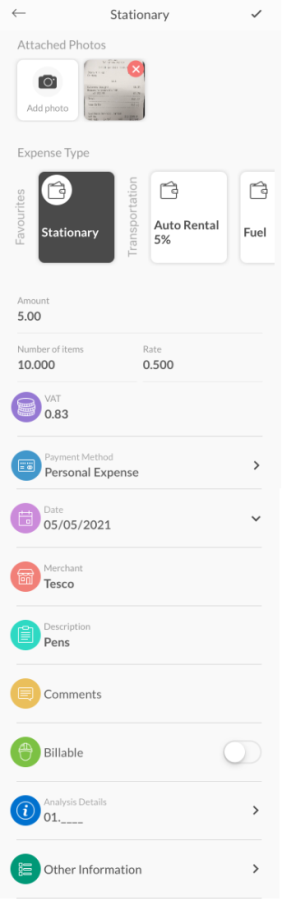
Example completed expense claim item:
Modifying an Expense Claim Item
-
Select the claim item from the Claim Items tab.
-
Tap the pencil icon in the top-right of the screen. The details of the claim item will now all be editable.
-
When you have finished making changes, click the tick icon in the top-right of the screen to save the claim item.
Deleting an Expense Claim Item
-
On the Claim Items tab, drag the claim item to the left until the Delete button becomes visible.
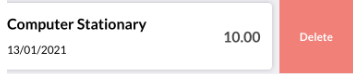
-
Tap Delete to delete the claim item.
Copying an Expense Claim Item
If you are creating multiple similar expense claim items, you can save time by using the Copy function. Copying a claim item opens a new expense claim item screen with identical details to the item you copied. You are then free to edit the item as you wish.
To copy an expense claim item:
-
On the Claim Items tab, drag the item to the right until the Copy button becomes visible.
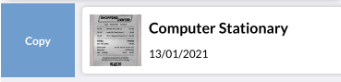
-
Tap Copy to copy the item. If the claim you are copying has receipts or other files attached to it, you will receive a popup asking whether you wish to copy the attachments.
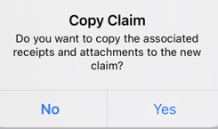
-
Tap "Yes" to copy the attachments to the new claim, or tap "No" to copy the claim item without the attachments.
Google Maps Mileage Claims
If the parameter to enable Google Maps functionality is active, the MILEAGE CLAIM button will be available on the Expenses widget on the dashboard.
To make a Google Maps mileage claim:
-
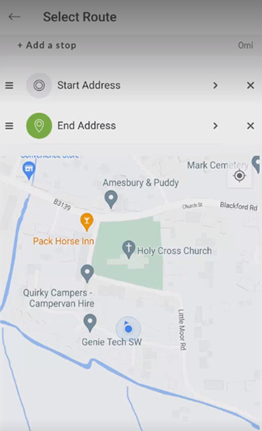
Tap MILEAGE CLAIM on the Expenses widget on the dashboard. This opens the Select Route screen.
-
Tap Start Address to open the Select Address screen, then enter the start address in the text field. Alternatively, if you have used the same address recently, you can select it from the Recent list. If you have any saved routes, you can also select them from the Saved Trips list. Selecting a saved route will fill in every stop from that route, not just the start address.
-
Tap End Address to open the Select Address screen, then enter the end address in the text field. Alternatively, if you have used the same address recently, you can select it from the Recent list.
-
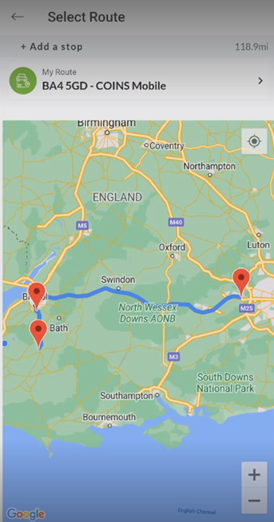
If you need to add an additional stop, tap +Add a stop. This opens the Select Address screen, where you can enter the address of the stop in the text field. Alternatively, if you have used the same address recently, you can select it from the Recent list. You can add up to six additional stops this way if necessary. To move a stop to an earlier or later position along the route, tap and hold the three lines icon to the left of the stop and drag to move it up or down the list.
-
Once at least a start and end address have been entered, the proposed route will be displayed in blue on the map below. Alternative routes may be displayed in grey. You can tap the routes on the map to switch between them. The length in miles of the currently selected route is shown in the top-right.
-
Once you have selected the route you took or wish to take, tap NEXT. This opens the Mileage Claim screen. This screen contains all the same fields as the usual Add Claim screen, along with some extra fields:
-
Tap Vehicle to open your list of vehicles, then tap to select the vehicle you used to make the journey.
-
Tap My Route to return to the Select Route screen to edit your route if necessary.
-
The calculated mileage is filled in automatically based on your selected route, and the payment amount is also calculated automatically using the calculated mileage and the rate. Depending on the expense parameter settings, you may be able to override the calculated mileage by entering a number in the Override Mileage field. If you override the calculated mileage, the number you enter will be used in the payment amount calculation instead. This may be necessary if the route you took did not match any of the routes proposed by Google Maps.
-
Tap "Save this route" to save the route to use it again in the future. The route will appear under the Saved Trips list during address selection. This is useful when you claim for the same route regularly, such as a daily commute.
-
-
See Entering an Expense Claim above for details on all other fields on this screen.
-
Tap the tick in the top-right of the screen to save the claim item.
Expense Claim Item Errors
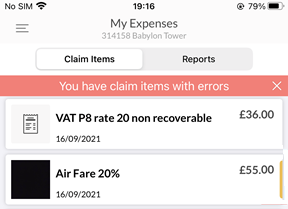
On the Claim Items tab, a notification at the top will inform you if any of your claim items have errors. Claim items with policy errors have a red marker on the right of the panel.

Claim items with analysis errors have an amber marker on the right side of the panel.
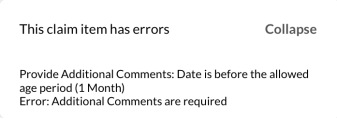
When viewing the details of a claim item, a notification at the bottom of the screen will inform you if the item includes any errors.
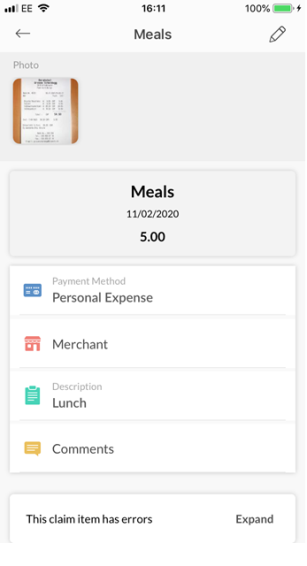
Tap Expand to view the details of the error(s).